
Reviewed · COPENHAGEN PHOTO SHOOTS
Copenhagen City Of Lights PhotoWalks Tour
Copenhagen looks different after the lights switch on. That shift is the whole point here: you work the blue hour and the first night-dark moments, when Copenhagen’s streets start glowing and photography stops being about daylight and starts being about night photography. It’s a laid-back walk with hands-on help from a professional photographer guide, plus a route built around major lights-on landmarks.
I really like two things about this tour. First, you get clear coaching on manual camera settings like aperture, shutter speed, and ISO, so you’re not just pointing and hoping. Second, it’s truly private, meaning the guide can slow down for you, adjust angles, and focus on what you need to get the shot.
One thing to plan for: you’ll want to bring a tripod. Longer exposures are part of the experience, and if you show up without one, you’ll feel it fast.
In This Review
- Key things to know before you go
- The Blue Hour to Night Switch: When Copenhagen Gets Photogenic
- Private Meeting Point and How the Tour Runs
- Stop at Nyhavn: Old Houses, Warm Windows, and Busy Reflections
- Queen’s Palace and the Big-Facade Approach to Night Shots
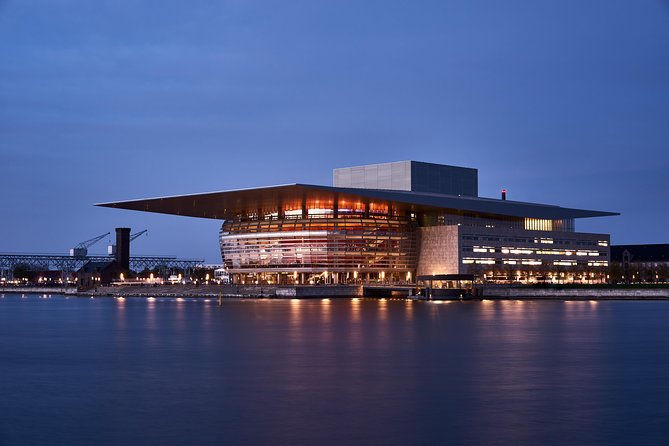
- Opera House and Parliament: Finding Angles That Feel Like You Planned Them
- Manual Settings and Long Exposure: What You Actually Learn
- Tripod Reality: Why It’s Required and How to Make It Work
- Weather, Timing, and Setting Expectations for Copenhagen Nights
- Price, Group Size, and Value for Your Camera Budget
- Who This PhotoWalks Tour Is For
- Should You Book This Copenhagen City of Lights PhotoWalks Tour?
- FAQ
- How long is the Copenhagen City of Lights PhotoWalks Tour?
- Is this tour private?
- What language is the tour offered in?
- Do I need to bring a tripod?
- Where does the tour start?
- Where does the tour end?
- Does the tour run in bad weather?
- What landmarks will we photograph?
- Can I cancel for a full refund?
Key things to know before you go
- Private photographer guide, not a group “herd” with personal attention and patience
- Blue hour to night timing so the city lights start working their magic
- Night-photo technique coaching focused on aperture, shutter speed, and ISO
- A landmark route built for photography: Nyhavn, Queen’s palace, Opera House, parliament, and more
- Long-exposure practice with guidance on how to use shutter speed with the scene
- Post-processing tips to help your images look the way you planned
The Blue Hour to Night Switch: When Copenhagen Gets Photogenic
Copenhagen’s lighting has a rhythm. Earlier, the sky can still hold that cool, soft tone photographers love. Then, as evening deepens, the city lights come up and the whole mood changes: reflections in wet pavement, warm window glow, and crisp contrast between buildings and dark sky.
That transition is why a “city of lights” photo walk is more than a sightseeing stroll. You’re training your eye for what changes at each moment, and your guide helps you turn that into usable photos, not random snaps. If you’re new, this is great because the guide can explain the why behind each setting. If you’ve shot at night before, it’s still useful because you get angles and exposure ideas you might not try on your own.
One practical reality: the idea of night darkness depends on the season. In Copenhagen, daylight can linger late, and the city may not look fully dark at the start time you expect. When that happens, you can still get great results—especially with street lights and building illumination—but your “night look” may be more staged and less pitch-black than you imagine.
More of Copenhagen worth pointing a camera at
Private Meeting Point and How the Tour Runs
You start at Memorial Anchor, Nyhavn 1F, 1051 København, Denmark. The tour ends back close to where you began, near the Metro station at Kongens Nytorv. It’s near public transportation, so you’re not stuck in the middle of nowhere with your tripod case.
The format is simple: you walk, you stop, you shoot, and you adjust. Because it’s private, the pace is flexible. If you’re still finding the right shutter speed for one scene, the guide can stay with you. If your camera settings are already dialed in, you’ll spend more time on composition and trying different angles.
Also, you’ll have a mobile ticket for the activity, so you’re not juggling paper. That sounds minor until you’re wearing gloves, standing in the cold, and trying to keep track of everything at once.
Stop at Nyhavn: Old Houses, Warm Windows, and Busy Reflections
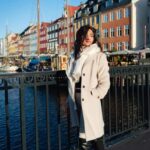
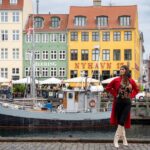
Nyhavn is famous for a reason: the buildings are photogenic, the area is visually dense, and the light has character. For this walk, it’s especially important because you’ll see Nyhavn when the lights turn on and the scene starts to feel theatrical.
This is where your guide’s photo coaching matters most. You’re not only capturing the subject; you’re learning how to shape the frame. That can mean:
- choosing an angle that keeps lines from buildings leading your eye
- controlling brightness so the windows don’t blow out
- using shutter speed to guide how light smears (or doesn’t)
Nyhavn can include lots of visual noise, especially when there’s activity. The guide helps you simplify the scene by choosing perspective and composition so the image feels intentional. If you’re the type who has a camera but struggles to decide what to photograph, Nyhavn is the perfect training ground.
Queen’s Palace and the Big-Facade Approach to Night Shots
From the more intimate waterfront feel of Nyhavn, the route shifts toward major civic and monumental buildings. Sites like the Queen’s palace (as listed on the route), parliament, and other landmark architecture give you a different kind of photography problem: symmetry, scale, and lighting that can be uneven across the facade.
This is where I like that the tour explicitly focuses on exposure and settings. With grand buildings, it’s easy to overexpose bright highlights or underexpose the darker stone. Your guide helps you find the balance so the building looks like the place you saw, not like a blown-out light bomb.
Expect guidance on:
- aperture choices for sharpness vs. depth of field
- shutter speed control for how “still” or “flowing” the scene looks
- ISO adjustments to keep noise under control in darker sections
You’ll also get composition tips that go beyond “stand there and shoot.” Think perspective and lines: how to frame wide facades without losing the sense of place.
Opera House and Parliament: Finding Angles That Feel Like You Planned Them
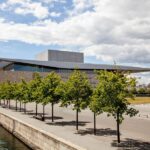
The Opera House and nearby landmark areas bring another photography style into play: cleaner lines, dramatic lighting, and often a better chance to practice long-exposure technique. Even when the sky isn’t fully dark yet, illuminated architecture can create strong contrast.
One practical thing the guide can help with is angle choice. From a single spot, an iconic building can look “correct” but not interesting. Move a few steps, change the height of your camera, and you suddenly get leading lines, better framing, or a more cinematic light pattern. On this tour, you’ll work through those decisions instead of guessing.
This is also a good moment to start thinking about your tripod workflow. If you set it up, adjust, shoot, then pack up instantly, you miss shots. If you’re too slow, you hold up the group. The guide’s patience is useful here, especially if you’re still learning manual settings or figuring out how your camera responds at night.
The whole city in one easy circuit
Manual Settings and Long Exposure: What You Actually Learn
The tour is built around a core idea: night photos get easier when you understand the tools. You’ll work with manual camera settings including aperture, shutter speed, and ISO. That matters because night shooting is not just about having a better camera; it’s about controlling light.
Here’s how this shows up in the real experience:
- You learn how shutter speed affects the look of moving elements and light trails.
- You practice exposure decisions so the scene matches what you see when you glance up at the buildings.
- You use creative composition methods like perspective, lines, and color control to make the frame feel designed.
The tour also mentions tips & tricks for post-processing. That’s important because raw night images can look flat straight out of the camera. Even basic edits—adjusting exposure, managing highlights, and fine-tuning color—can help your photos look like the mood you felt in the streets.
And here’s my practical takeaway: even if you only remember one thing during the walk, focus on how shutter speed and ISO interact. If one is pushing too hard, the other usually needs to be adjusted to keep the image clean.
Tripod Reality: Why It’s Required and How to Make It Work
You do need a tripod for this tour, because you’ll be doing longer exposures to capture the true essence of night scenes. That’s not just a rule on a page. Tripods help you keep your frame sharp and allow the shutter speeds you’ll want for city-light effects.
If you’ve never used a tripod at night, don’t overthink it, but do practice before the first stop. You want:
- stable footing on uneven pavement
- a quick way to adjust framing without knocking the tripod
- patience while you wait for the right moment and light balance
Also, remember that wind and vibration happen outdoors. A tripod won’t stop everything, but it gives you the best chance at crisp images when exposure time stretches.
Weather, Timing, and Setting Expectations for Copenhagen Nights
The tour operates in all weather conditions, so you should dress appropriately. That’s not just comfort talk. If you’re cold and distracted, it shows in how quickly you can experiment with settings.
Timing is the other big expectation piece. The experience is described as happening just before sunset, between the blue hour and actual night. In real Copenhagen, “actual night” can arrive later than you expect depending on the time of year. One review flagged that the tour can be labeled as starting earlier in the evening, but it may still stay light well after 10pm. If that’s your season too, you’ll still get good photos, but you may spend more time working with the partially lit sky and less on a fully dark atmosphere.
If you go in with that mindset—blue hour can still deliver dramatic results—you’ll feel less like you missed the “classic night” and more like you learned how to work with what you get.
Price, Group Size, and Value for Your Camera Budget
At $233.63 per person for about 3 hours, this is not a bargain-basement activity. You’re paying for something specific: a professional photographer guide who helps with composition, exposure, and camera settings, plus the private nature of the walk.
Here’s why it can still be good value. You’re getting:
- structured instruction on manual night settings (aperture, shutter speed, ISO)
- help choosing angles at multiple famous landmarks
- a private setup where your questions don’t get rushed
And because it’s private, you can bring up to three friends or family members included in the price (as described). That means the cost can feel more reasonable if you book with people who will actually use the coaching instead of waiting around.
If you’re the lone photographer who wants a step-by-step night workflow, this tour can save you trial-and-error time. If you’re mostly there for casual photos and don’t want to touch settings, you might find it less worth it.
Who This PhotoWalks Tour Is For
I’d put this tour in the sweet spot for:
- beginners who want to learn night photography the right way
- enthusiasts who already shoot on manual and want sharper guidance on exposure and composition
- anyone who loves Copenhagen landmarks and wants photos that feel more intentional than typical sightseeing shots
It’s also a good fit if you like instruction. This is not only about where to stand; it’s about how to think while you shoot.
Should You Book This Copenhagen City of Lights PhotoWalks Tour?
Book it if you want a guided path through the city’s night lighting and you’re excited to learn settings, composition, and long-exposure technique. The private format is a real advantage, especially if you want patience as you figure out manual exposure.
Skip it if you hate tripods, don’t want to touch camera settings, or only want casual photos with zero learning curve. Night work takes time, and this tour is built for people who want to practice.
If you go in ready to shoot—tripod in hand, jacket on, and mindset set for blue hour through night—you’ll leave with photos you can actually explain and settings you can reuse the next time you’re in a dark city with lights on.
FAQ
How long is the Copenhagen City of Lights PhotoWalks Tour?
It lasts about 3 hours.
Is this tour private?
Yes. It’s a private tour, meaning only your group participates. You can bring up to three friends or family members included in the price.
What language is the tour offered in?
The tour is offered in English.
Do I need to bring a tripod?
Yes. You are required to bring a tripod because you’ll be doing longer exposures for night scenes.
Where does the tour start?
The start point is Memorial Anchor, Nyhavn 1F, 1051 København, Denmark.
Where does the tour end?
It ends back at the meeting point, close to the Metro station at Kongens Nytorv.
Does the tour run in bad weather?
It operates in all weather conditions, so dress appropriately.
What landmarks will we photograph?
You’ll get chances to photograph places such as Nyhavn, the Queen’s palace, the Opera House, parliament, and other important landmarks on the route.
Can I cancel for a full refund?
Yes. You can cancel up to 24 hours in advance for a full refund.
More Tours in Copenhagen

More Tour Reviews in Copenhagen
More Copenhagen Photo Shoots

Fresh Off the Cobbles: The Newest Copenhagen Reviews


Copenhagen Photo Shoots, compared.
 ★ 5.0Photoshoot around Copenhagen’s Iconic LocationsFrom $42028 reviews
 ★ 4.9Instagram tour of Copenhagen with a private photographerFrom $25912 reviews
 ★ 5.0Private Photography Portraits City Activity in CopenhagenFrom $21012 reviews
 ★ 5.0Photo Shoot in Copenhagen with a Personal PhotographerFrom $6028 reviews
 ★ 5.0Private and Professional Photo ShootFrom $2944 reviews
 ★ 3.2Capture the most Photogenic Spots with a LocalFrom $1284 reviews
Browse the lists this tour appears in